
Seats, mirrors and steering wheel
Vehicle features and options
This chapter describes model-specific equip-
ment, systems, and functions that are currently
available, or may become available in the fu-
ture, even if they are not
present in the vehicle.
Additional information:
Vehicle equipment, refer to page
.
Sitting safely
An ideal seat position that meets the needs of
the occupants can make a vital contribution to
relaxed, fatigue-free
driving.
In the event of an accident, having the correct
seat position and using the protection systems
correctly both play an important role. Follow
the information in the following chapters:
▷
Front seats, refer to page
.
▷
.
▷
Head restraints, refer to page
.
▷
Airbags, refer to page
.
Front seats
Safety information
WARNING
Seat setting while driving can lead to unex-
pected movements of the seat. There is a
risk of accident, injury, and property damage.
Only adjust the seats when the vehicle is sta-
tionary.
WARNING
With a backrest inclined too far to the rear,
the protective effect of the seat belt can no
longer be ensured. There is a risk of sliding
under the seat belt in an accident. There is
a risk of injury and danger to life. Adjust the
seat prior to starting the trip. Adjust the back-
rest so that it is in the most upright position
as possible and do not adjust again while
driving.
WARNING
There is a danger of jamming when moving
the seats. There is a risk of injury and risk of
property damage. Make sure that the travel
path of the seat is clear prior to any adjust-
ment.
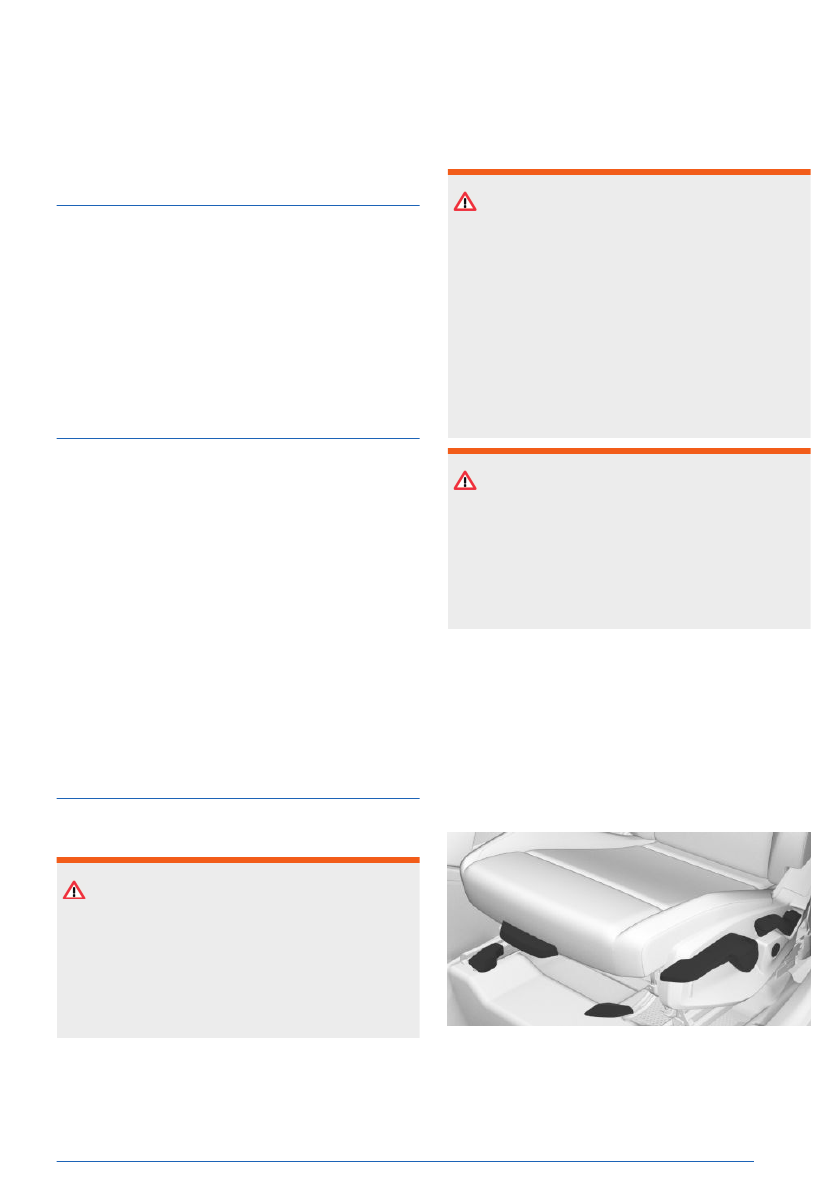
Manually adjustable seats
Principle
Manually adjustable seats are operated using
the levers on the seat.
Overview
The levers for setting the seats are located on
the front seats.
Seats, mirrors and steering wheel
Controls
99
Online Edition
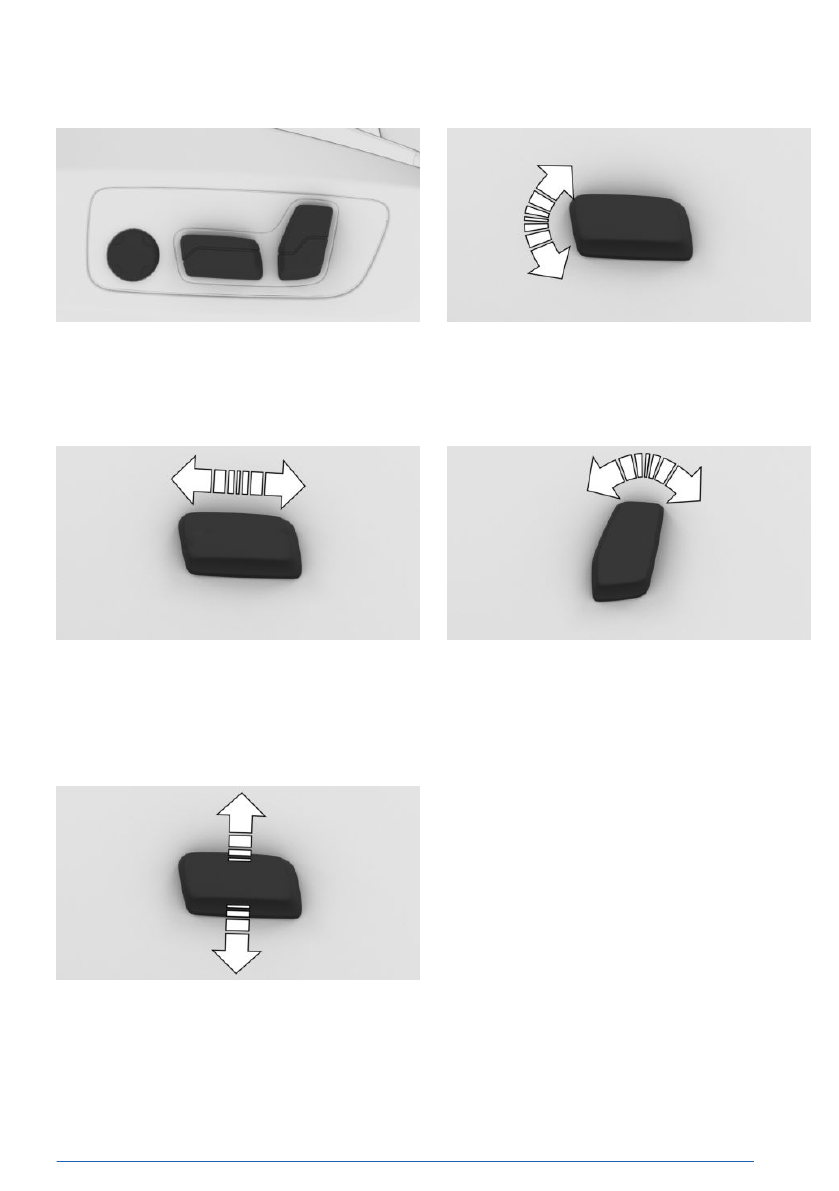
Overview
The switches for setting the seats are located
on the front seats.
Setting the longitudinal direction
To adjust the longitudinal direction, push the
longitudinal direction switch on the seat for-
ward or backward.
Adjusting the height
To adjust the seat height, press the seat height
switch up or down.
Adjusting seat tilt
To adjust the seat tilt, flip the seat tilt switch up
or down.
Adjusting backrest tilt
To adjust the backrest tilt, flip the backrest tilt
switch forward or backward.
Adjusting the seat position automati-
cally
Principle
The seat setting for the driver's seat is stored
in the active BMW ID or in the active driver
profile. If the BMW ID or driver profile is reacti-
vated at a later time, the saved seat position
will be applied automatically.
Activate/deactivate the function
1.
To activate/deactivate automatic adjust-
ment of the seat position, go through the
menu as follows: Apps menu / "Vehicle" /
"Seat comfort" / "Driver" / "Automatically
use seat position".
2.
Select the desired setting.
Seats, mirrors and steering wheel
Controls
101
Online Edition

Seat massage menu
To go directly to the Seat Massage
menu on the control display, press the
lumbar support button on the seat.
Turning the seat massage on/off
To turn the seat massage on/off, proceed as
follows:
1.
Go through the menu as follows via iDrive:
Apps menu / "Vehicle" / "Seat comfort".
2.
Select the desired seat.
3.
"Seat massage"
4.
Select the desired setting, as necessary.
The seat massage is stopped when the lumbar
support is operated.
Calibrating the front seats
Principle
If the electric seat adjuster is no longer work-
ing properly, the driver’s seat is calibrated au-
tomatically. The driver’s seat is calibrated au-
tomatically after the vehicle is exited and the
doors closed.
If the
driver’s seat cannot be calibrated auto-
matically or calibration of the front passenger
seat is required, a Check Control message ap-
pears on the control display. The front seats
must be calibrated in order for the electric seat
adjuster to work properly again.
Safety information
WARNING
There is a danger of jamming when moving
the seats. There is a risk of injury and risk of
property damage. Make sure that the travel
path of the seat is clear prior to any adjust-
ment.
Functional requirements
To calibrate the front seats, the following func-
tional requirements must be met:
▷
Selector lever position P is engaged.
▷
The seat to be calibrated is unoccupied.
Calibrating the front seat manually
1.
To calibrate the rear seat position, press
and hold the longitudinal direction switch
backward until the seat stops.
2.
Repeat step 1 until the seat stops then
moves slightly in the opposite direction.
The rear end position is calibrated.
3.
To calibrate the front seat position, press
and hold the longitudinal direction switch
forward until the seat stops.
4.
Repeat step 3 until the seat stops then
moves slightly in the opposite direction.
The front end position is calibrated.
As soon as the message on the control dis-
play disappears, the calibration is complete.
If the message remains active, repeat the cali-
bration.
If the message
is still shown after repeated
calibration, have the vehicle checked by an
authorized service center or another qualified
service center or repair shop.
Comfort exit
Principle
The comfort exit setting makes it easier to get
in/out of the vehicle by automatically adjusting
the seat position and moving the seat back.
Activating/deactivating comfort exit
1.
To activate/deactivate Comfort Exit, go
through the menu as follows: Apps menu /
"Vehicle" / "Seat comfort" / "Comfort exit".
2.
Select the desired setting.
Seats, mirrors and steering wheel
Controls
103
Online Edition
Seat belts
Principle
The vehicle is fitted with five seat belts to en-
sure occupant safety. However, they can only
offer protection when
adjusted correctly.
Always make sure that seat belts are being
worn by the occupants before driving off. The
airbags supplement the seat belts as an ad-
ditional safety device. The airbags do not re-
place seat belts.
All
seat belt anchorage points are designed to
achieve the best possible protective effect of
the seat belts when used properly and with the
correct seat
settings.
The two outer seat belt buckles of the rear
seats are intended for the persons sitting on
the left and right.
The
center seat belt buckle of the rear seats is
intended for the person sitting in the middle.
Safety information
WARNING
Use of a seat belt to buckle more than one
person will potentially defeat the ability of
the seat belt to serve its protective function.
There is a risk of injury and danger to life.
Do not strap in more than one person per
single seat belt. Infants and children are not
allowed on an occupant's lap, and must be
transported and secured in designated child
restraint systems.
WARNING
The protective effect of safety gear, including
seat belts, can be limited or lost when seat
belts are fastened incorrectly. An incorrectly
fastened seat belt can cause additional inju-
ries, for instance in the event of an accident,
braking or evasive maneuvers. There is a risk
of injury and danger to life. Make sure that all
occupants are wearing seat belts correctly.
WARNING
With a rear seat backrest that is not locked,
the protective effect of the middle seat belt is
not guaranteed. There is a risk of injury and
danger to life. If you are using the middle seat
belt, lock the wider rear seat backrest.
WARNING
The protective effect of safety gear, including
seat belts, may not be fully operational or fail
in the following situations:
▷ The seat belts or seat belt buckles are
damaged, soiled, or changed in any
other way.
▷ Seat belt tensioners or seat belt winders
were modified.
Seat belts can be imperceptibly damaged in
the event of an accident. There is a risk of
injury and danger to life. Keep clean and do
not modify: seat belts, seat belt buckles, seat
belt tensioners, seat belt winders, and seat
belt anchors. After an accident, have the seat
belts checked by an authorized service center
or another qualified service center or repair
shop.
Correct use of seat belts
To use the seat belts correctly, note the follow-
ing:
▷
Wear the seat belt so that it fits tightly to
your body over your pelvis and shoulder
and is not twisted.
▷
Wear the seat belt low down on your hips
in the pelvic region. The seat belt must not
press on your stomach.
Seats, mirrors and steering wheel
Controls
105
Online Edition
Seat belt reminder
Principle
The Seat Belt Warning warns the driver if the
seat belts are not fastened.
General information
The seat belt reminder becomes active in the
following situations:
▷
When the seat belt on the driver's side or
on the passenger's side is not fastened.
▷
When the seat belt is unfastened while driv-
ing.
▷
When objects are lying on a seat.
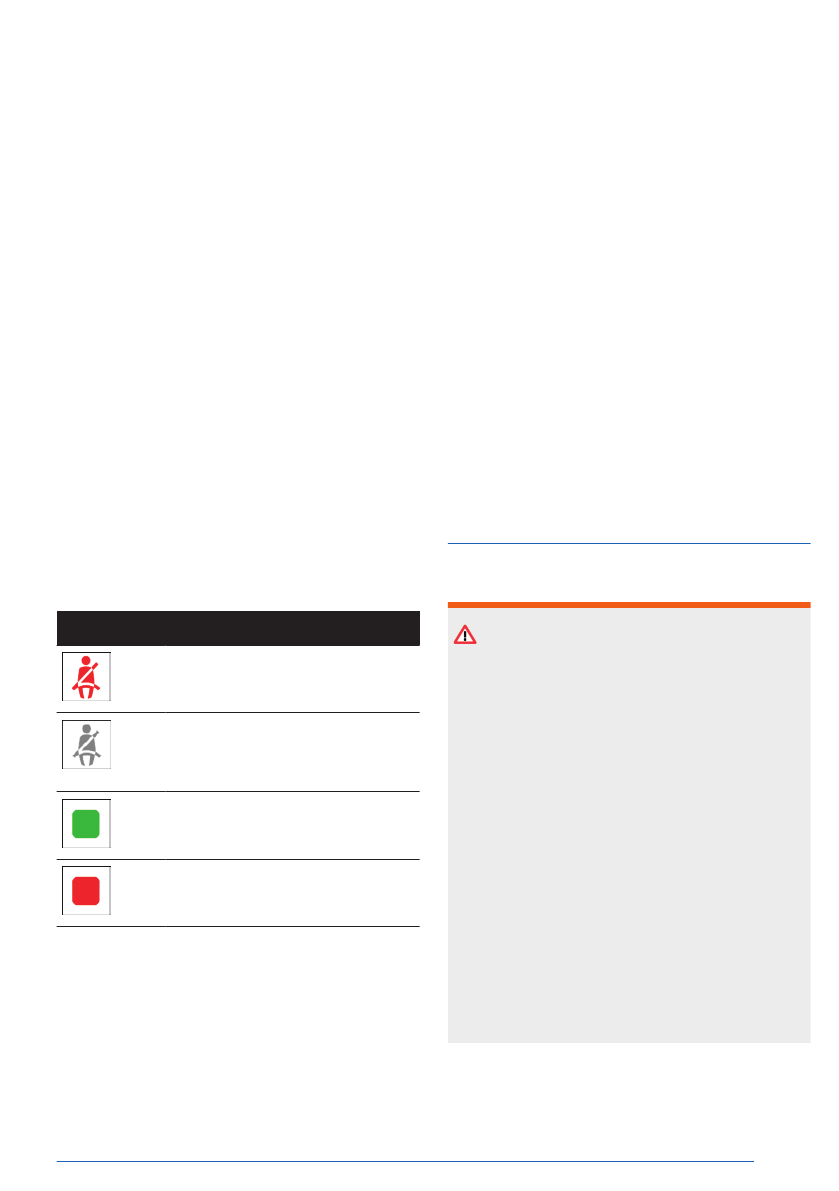
Display in the instrument cluster
The indicator light in the instrument cluster illu-
minates after turning on the drive-ready state
when the seat belt reminder
is active.
If a Check Control message appears, check
whether the seat belt is fastened correctly.
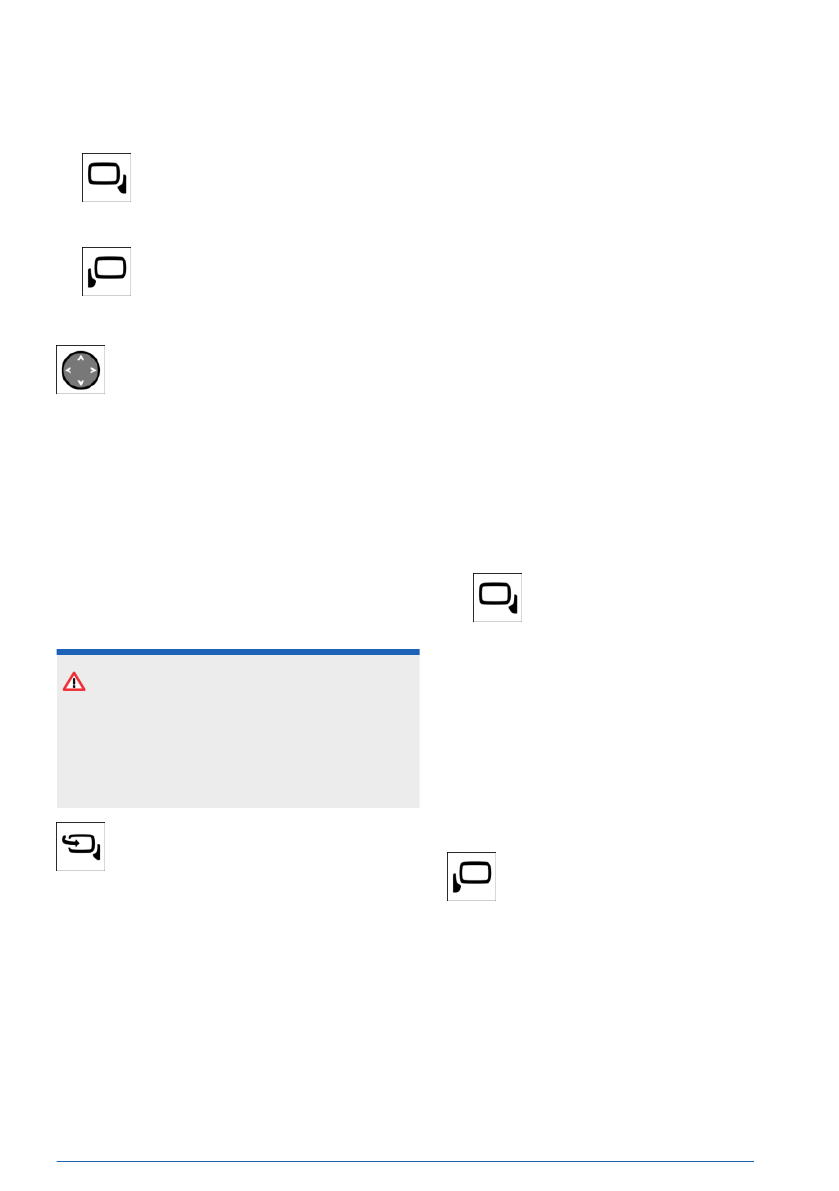
Icon
Meaning
Seat belt on the driver's seat is
not buckled.
Seat belt on the passenger
seat or another seat in the ve-
hicle is not buckled.
Seat belt is buckled on the cor-
responding seat.
Seat belt is not buckled on the
corresponding seat.
Rear Occupant Alert
Principle
At the end of the drive, the Rear Occupant
Alert informs the driver that occupants may be
present on the rear seats.
General information
If a door with access to the rear seat row is
operated within 30 minutes before starting a
drive, a notice appears on the control display
and a signal tone sounds at the end of the
drive.
If the drive is
continued within 30 minutes, the
notice is displayed again after the drive is com-
plete.
Activating/deactivating the Rear Occu-
pant Alert
1.
To enable/disable the Rear Occupant Alert,
go through the menu as follows: Apps
menu / "Vehicle" / "Rear Occupant Alert".
2.
Select the desired setting.
Front head restraints
Safety information
WARNING
The lack of protective effect due to removal
or incorrect adjustment of head restraints can
cause injuries in the head and neck area.
There is a risk of injury.
▷ Before driving, install the removed head
restraints on the occupied seats.
▷ If possible, adjust the head restraint so
that the center of the head restraint sup-
ports the back of the head at eye level.
▷ Adjust the distance so that the head re-
straint is as close as possible to the back
of the head. Adjust the distance via the
backrest tilt as needed.
▷ For manually adjustable head restraints:
After adjusting, make sure that the head
restraint is correctly engaged.
Seats, mirrors and steering wheel
Controls
107
Online Edition
▷ Before driving, install the removed head
restraints on the occupied seats.
▷ If possible, adjust the head restraint so
that the center of the head restraint sup-
ports the back of the head at eye level.
▷ Adjust the distance so that the head re-
straint is as close as possible to the back
of the head. Adjust the distance via the
backrest tilt as needed.
▷ For manually adjustable head restraints:
After adjusting, make sure that the head
restraint is correctly engaged.
WARNING
Body parts can be jammed when moving the
head restraint. There is a risk of injury. Make
sure that the area of movement is clear when
moving the head restraint.
WARNING
Objects on the head restraint reduce the pro-
tective effect in the head and neck area.
There is a risk of injury.
▷ Do not use seat or
head restraint covers.
▷ Do not hang objects, for instance clothes
hangers, directly on the head restraint.
▷ Only use accessories that have been de-
termined to be safe for attachment to a
head restraint.
▷ Do not use any accessories, for instance
pillows, while driving.
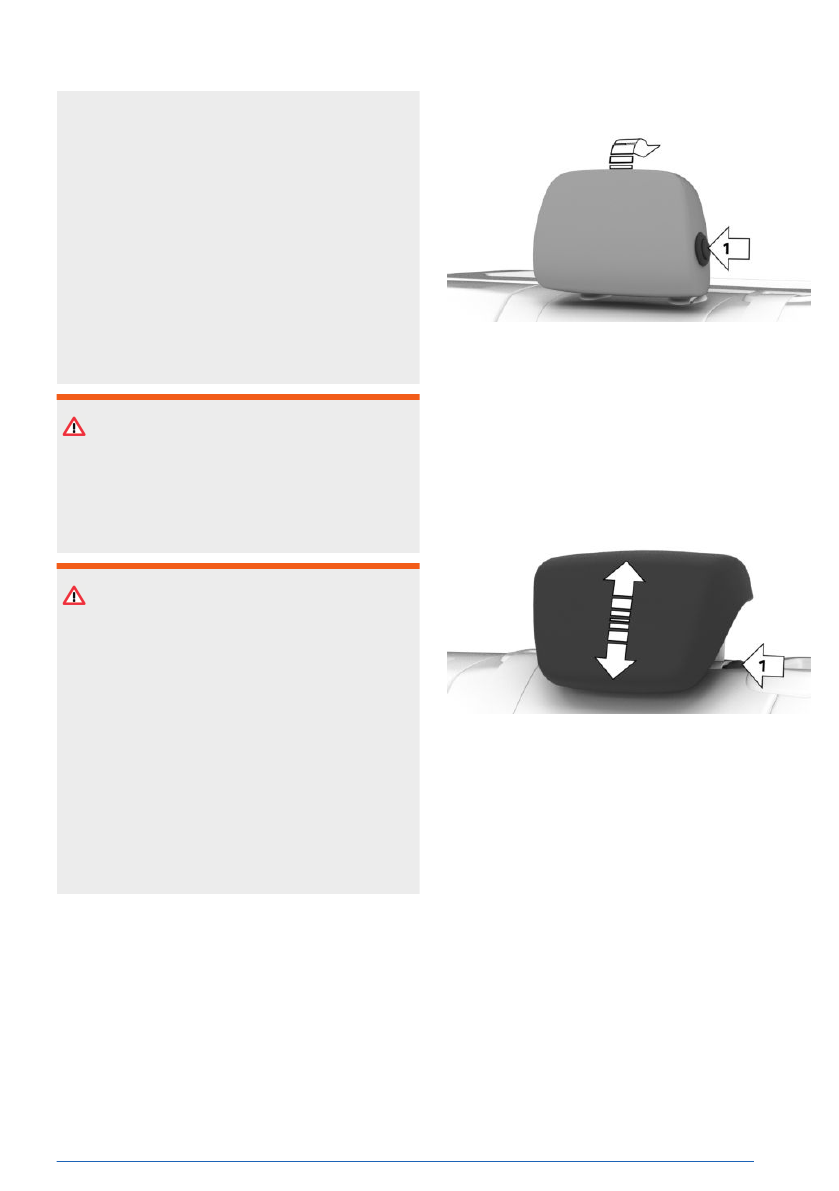
Folding down the head restraints
Principle
To improve the view to the rear, the head re-
straints can be folded back. Only fold the head
restraint back if no one will be sitting in the
seat in question.
Folding the head restraint
Press the button and fold the head restraint
back, arrow 1.
To
return the head restraint to its initial posi-
tion, fold the head restraint forward as far as it
will go until it engages.
Adjusting the height
▷
To lower the head restraint, press the re-
lease button on the backrest, then push the
head restraint downward, arrow 1.
▷
To raise the head restraint, push the head
restraint upward.
Removing/attaching the head re-
straints
Only remove the head restraint if no one will be
sitting in the seat in question.
1.
Fold down the corresponding rear seat
backrest.
Seats, mirrors and steering wheel
Controls
109
Online Edition
Selecting/adjusting the exterior mir-
rors
▷
To select the left exterior mirror,
press the corresponding button on
the driver’s door. The LED illumi-
nates.
▷
To select the right exterior mirror,
press the corresponding button on
the driver’s door. The LED illumi-
nates.
On the driver's door, press the button
for adjusting the exterior
mirrors.
The selected exterior mirror moves
along with the button movement.
Malfunction
In case of an electrical malfunction, adjust the
exterior mirror by pressing on the edges of the
mirror glass.
Folding in/folding out the exterior
mirrors
NOTICE
Depending on the vehicle width, the vehicle
can be damaged in car washes. There is a
risk of property damage. Before washing, fold
in the mirrors by hand or with the button.
To fold the exterior mirrors in/out,
press the button for folding the exterior
mirrors in/out on the driver's door.
Folding is possible up to a speed of approx.
15 mph/20 km/h.
Folding
the exterior mirrors in and out is help-
ful in the following situations:
▷
In car washes.
▷
On narrow roads.
Exterior mirrors that were folded in are folded
out automatically at a speed of approx.
25 mph/40 km/h.
Automatic heating
Both exterior mirrors are automatically heated
as needed and when the drive-ready state is
switched on.
Automatic dimming
The exterior mirror on the driver's side is au-
tomatically dimmed. Photocells in the interior
mirror are used to control this.
Automatic Curb Monitor
Principle
If reverse gear is engaged, the mirror glass on
the passenger's side is tilted downward. Tilting
the mirror glass downward improves the driv-
er’s view of the curb or other ground-level ob-
stacles, e.g., when pulling into a parking space.
Activating the Automatic Curb Monitor
1.
To activate the Automatic Curb
Monitor, press the exterior mirror button on
the driver’s door. The LED illuminates.
2.
Engage selector lever position R.
When the trailer power socket is occupied or
trailer towing is activated, the Automatic Curb
Monitor is deactivated.
Deactivating the Automatic Curb Moni-
tor
To deactivate the Automatic Curb Mon-
itor, press the exterior mirror button on
the front passenger door. The LED illu-
minates and the LED of the driver’s side out-
side mirror goes out.
Seats, mirrors and steering wheel
Controls
111
Online Edition
Memory function
Principle
The following settings can be stored and, if
necessary, retrieved using the memory func-
tion:
▷
Seat position.
▷
Exterior mirror adjustment.
▷
Lumbar support position.
▷
Height of the Head-up display.
Safety information
WARNING
Using the memory function while driving can
lead to unexpected seat or steering wheel
movements. There is a risk of accident, in-
jury, and property damage. Only retrieve the
memory function when the vehicle is station-
ary.
WARNING
There is a danger of jamming when moving
the seats. There is a risk of injury and risk of
property damage. Make sure that the travel
path of the seat is clear prior to any adjust-
ment.
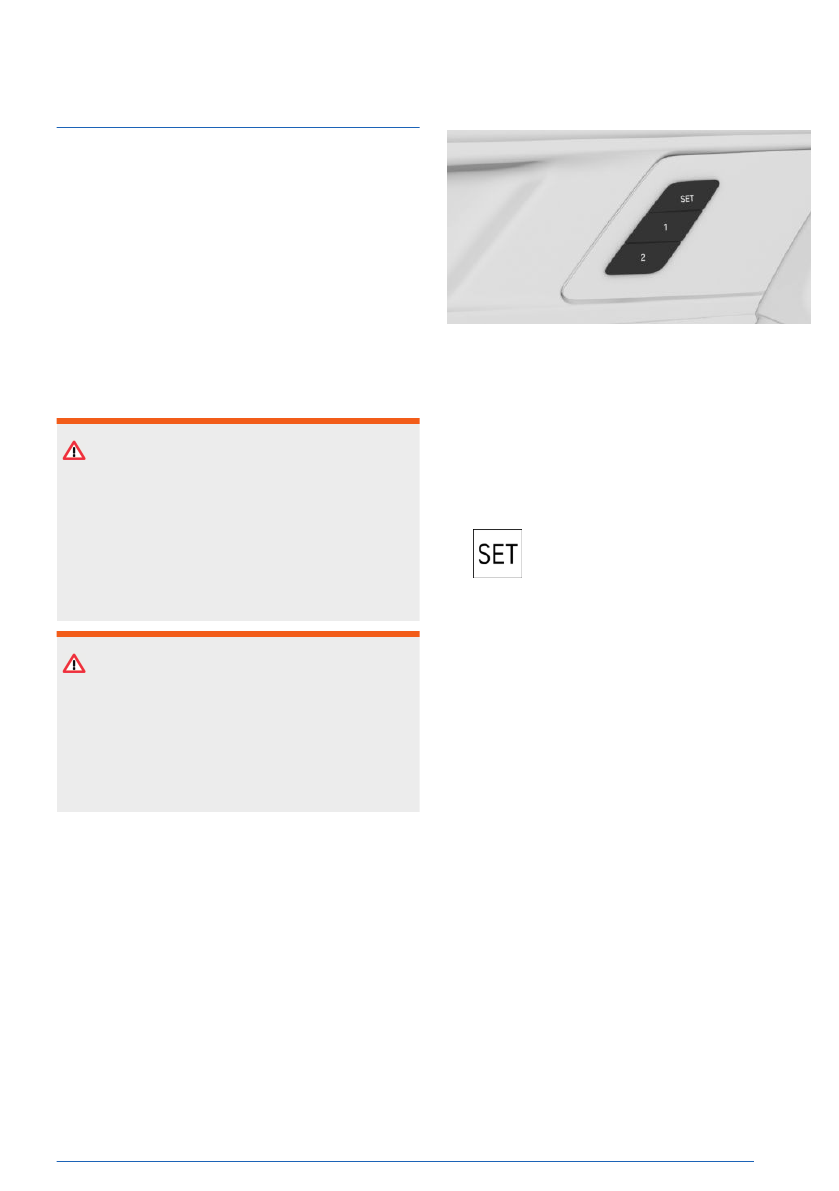
Overview
The memory buttons are located on the driv-
er's door.
Storing settings
To save settings to memory using the buttons,
proceed as follows:
1.
Set the desired position.
2.
Press the SET button on the driver's
door. The LED illuminates.
3.
Press memory button 1 or 2 while the LED
is illuminated. A successful save is indi-
cated by a signal tone.
To save settings to memory via iDrive, proceed
as follows:
1.
Go through the menu as follows: Apps
menu / "Vehicle" / "Seat comfort".
2.
Select the desired seat position.
3.
Tap the icon for the SET button.
Calling up settings
To access settings saved to memory using the
buttons, proceed as
follows:
Press memory button 1 or 2.
The stored position is called up.
The procedure stops
when a seat setting
switch or one of the memory buttons is
pressed again.
Seats, mirrors and steering wheel
Controls
113
Online Edition
")


