
Interior equipment
Vehicle features and options
This chapter describes model-specific equip-
ment, systems, and functions that are currently
available, or may become available in the fu-
ture, even if they are not
present in the vehicle.
Additional information:
Vehicle equipment, refer to page
.
Integrated universal remote
control
Principle
The integrated universal remote control in the
interior mirror can operate remote-controlled
systems such as garage doors, alarm systems,
or locking systems.
General information
The integrated universal remote control repla-
ces various hand-held transmitters for remote-
controlled systems. To operate the remote
control, the buttons on the interior mirror must
be programmed with the
desired functions.
If possible, do not install the antenna of the
remote-controlled system near metal objects
to ensure the best possible operation.
Safety information
WARNING
The operation of remote-controlled systems
with the integrated universal remote control
such as the garage door may result in injury,
for example, body parts becoming jammed in
a garage door. There is a risk of injury and
risk of property damage. Make sure that the
travel path of the respective system is clear
during programming and operation. Also fol-
low the safety instructions of the hand-held
transmitter.
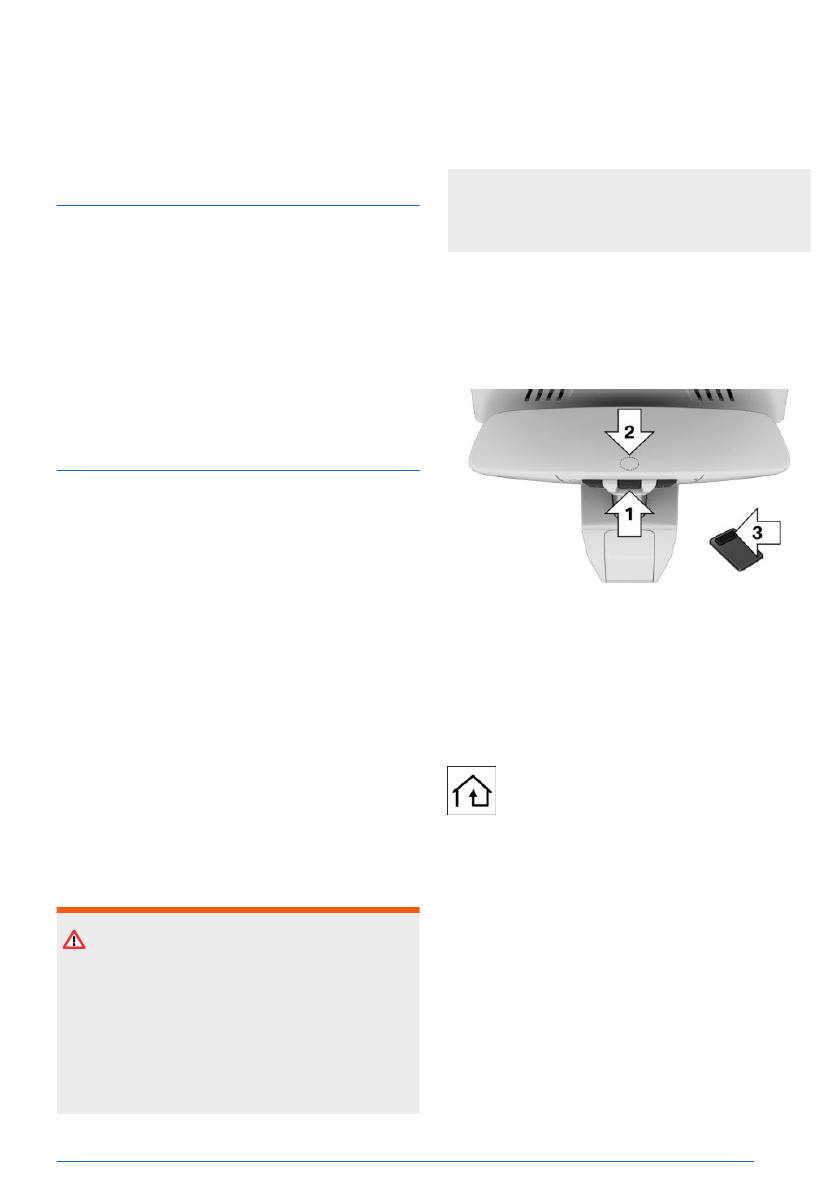
Operating elements on the interior
mirror
The operating elements on the interior mirror
consist of the following elements:
▷
Buttons, arrow 1.
▷
LED, arrow 2.
▷
Hand-held transmitter for remote-control-
led system, arrow 3.
Compatibility
If this icon is printed on the packaging
or in the operating instructions for the
remote-controlled system, the system
is generally compatible with the integrated uni-
versal remote
control.
Additional questions are answered by:
▷
An authorized service center or another
qualified service center or repair shop.
▷
www.homelink.com on the Internet.
HomeLink is a registered trademark of Gentex
Corporation.
For any
additional questions, contact an au-
thorized service center or another qualified
service center or repair shop.
Interior equipment
Controls
291
Online Edition

The interior mirror LED illuminates green while
the wireless signal is being transmitted.
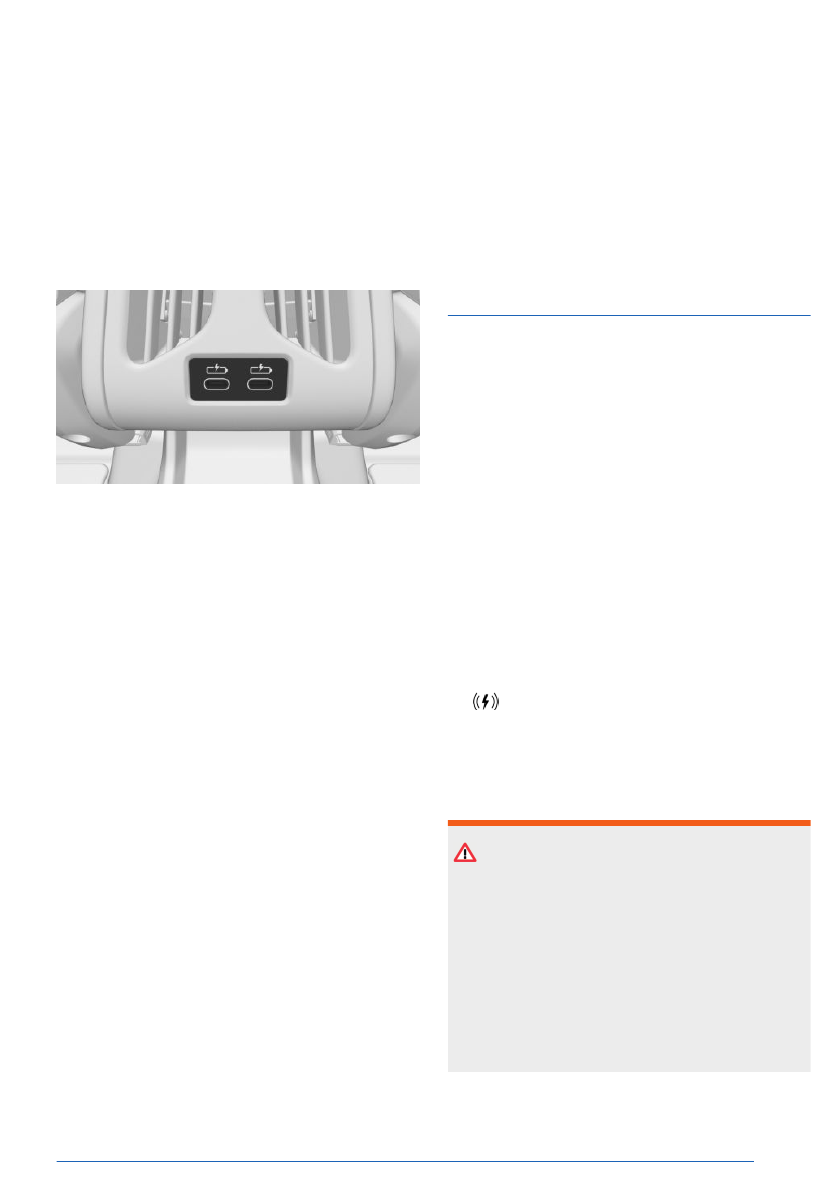
Deleting a button assignment
The programming for the interior mirror but-
tons can be deleted, e.g., before selling the
vehicle.
Press and hold
the two outer buttons on
the interior mirror simultaneously for approx.
10 seconds until the LED
flashes green.
All stored button assignments will be deleted.
Sun visor
Glare shield
To protect against glare, fold the sun visor up
or down.
Glare shield from the side
Folding the sun visor out
To prevent glare from the side window, pro-
ceed as follows:
1.
Fold down the sun visor.
2.
Detach the sun visor from its mount and
swing it toward the side window.
Folding the sun visor in
Proceed in the reverse order to close the sun
visor.
Vanity mirror
A vanity mirror is located in the sun visor be-
hind a cover.
Sockets
Principle
The socket can be used for electronic devi-
ces when the standby or drive-ready state is
switched on.
General information
The total load of all sockets must not exceed
140 watts at
12 volts.
Do not damage the socket by using unsuitable
connectors.
Safety information
WARNING
Devices and cables in the unfolding area of
the airbags such as portable navigation devi-
ces can hinder the unfolding of the airbag or
be thrown around in the car's interior while
unfolding. There is a risk of injury and risk
of property damage. Make sure that devices
and cables are not in the airbag's area of
unfolding.
WARNING
If metal objects fall or are plugged into elec-
tronic interfaces, e.g., sockets or USB ports,
these objects can cause a short circuit and
destroy the interface. There is a risk of injury
and risk of property damage. Make sure to
prevent metal objects from falling or being
plugged into electronic interfaces. Close the
socket again after use, e.g., with the socket
cover.
Interior equipment
Controls
293
Online Edition
These USB ports have the following character-
istics:
▷
USB port Type C.
▷
For charging mobile devices.
▷
Charge current: max. 3 A.
Rear center console
Depending on vehicle equipment, the back of
the center console will have one or two USB
ports.
These USB ports
have the following character-
istics:
▷
USB port Type C.
▷
For charging mobile devices.
▷
Charge current: max. 3 A.
Connecting mobile devices
When connecting the mobile device to the USB
port, note the following:
▷
Do not use force when plugging the con-
nector into the USB port.
▷
If necessary, use a flexible adapter cable.
▷
Protect the mobile device from mechanical
damage.
▷
Do not expose the mobile device to ex-
treme environmental conditions, e.g., very
high temperatures. See the device operat-
ing instructions.
Incompatible USB devices
The following mobile USB devices are not suit-
able for connection to the vehicle:
▷
Devices such as fans or bulbs.
▷
Devices with a power consumption of more
than 3 A at 5 V.
Wireless charging tray
Principle
The wireless charging tray is used to wirelessly
charge Qi-certified smartphones.
General information
Different charging powers, e.g., fast charging,
are supported depending on
the smartphone.
The integrated fan cools the smartphone being
charged.
When inserting
the smartphone to be charged,
make sure that there is nothing between the
smartphone to be charged and the wireless
charging tray.
The
charging process is shown as follows:
▷
Charging indicator on the control dis-
play.
▷
Illumination of the storage area.
Safety information
WARNING
When charging a device in the Wireless
Charging tray, any metal objects in the tray
with this device may become very hot. Stor-
age media or electronic cards, e.g., chip
cards, cards with magnetic strips, or cards
for transmitting signals, may not function cor-
rectly when placed together on the tray with
the device. There is a risk of injury and risk
of property damage. When charging mobile
Interior equipment
Controls
295
Online Edition
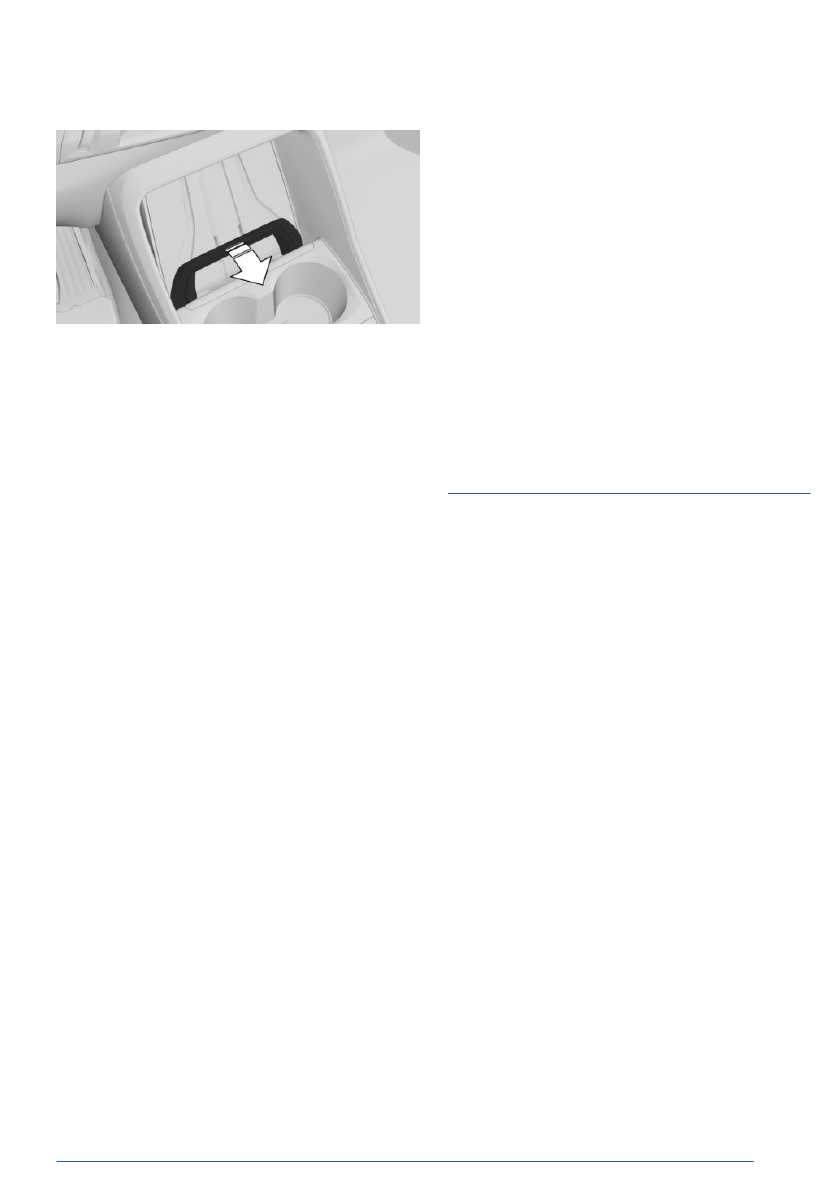
Opening/closing the retaining clip
The phone holder can be opened to make it
easier to insert and remove a
smartphone.
To open, swing out the retaining clip at the top
edge until it clicks into
place.
To close, push the retaining clip out of the
catch mechanism.
Forgotten warning
General information
A warning may be issued if a Qi-certified
smartphone was forgotten in the wireless
charging tray when leaving
the vehicle.
The forgotten warning is displayed in the in-
strument cluster.
Enable/Disable Forgotten Warning
To activate/deactivate the Forgotten Warning,
go through the menu as follows: Apps menu /
"Vehicle" / "System settings" / "Wireless
Charging tray" / "Mobile phone reminder".
System limits
The charge current may be reduced or charg-
ing may be temporarily interrupted in the wire-
less charging tray in the following situations:
▷
Due to excessive temperatures of the wire-
less charging tray and smartphone.
▷
If there are objects between the smart-
phone and wireless charging tray.
▷
If storage media or electronic cards,
e.g., chip cards, cards with magnetic
stripes, or cards for signal transmission, are
located between the smartphone and wire-
less charging tray.
▷
Due to protective sleeves and covers that
exceed a thickness of 0.07 in/2 mm.
▷
Due to protective sleeves and covers made
of unsuitable material, e.g., with magnetic
parts.
▷
Due to add-on parts for the smartphone,
e.g., holders.
▷
By configuring the smartphone settings,
e.g., for charging. Follow the instructions
given on the control display and smart-
phone, as applicable.
Interior camera
Principle
The interior camera can be used to record the
vehicle
interior.
Before the interior camera can be used for the
first time, the recording function and, if neces-
sary, data transfer must be enabled on the
control display. Additional activation may be
required for some system
functions.
Two infrared light sources next to the camera
lens illuminate while the interior camera is ac-
tive. Infrared light sources may be visible, de-
pending on lighting
conditions.
The interior camera can provide the following
functions:
▷
Interior camera.
Media
can be recorded, saved, and played.
▷
Remote Inside View.
The
vehicle interior can be recorded using
the My BMW App.
▷
Anti-Theft Recorder.
If
the alarm system is triggered, the vehicle
interior is automatically recorded. Record-
ings can also be played using the My BMW
App.
Interior equipment
Controls
297
Online Edition

▷
Data transfer is activated.
▷
A mobile device is connected to the vehicle
via Wi-Fi.
The following functional requirements apply
for the Remote Inside View and Anti-Theft Re-
corder functions:
▷
The Privacy Policy has been accepted.
▷
The My BMW App is installed on the mobile
device.
▷
The My BMW App is linked to the Connect-
edDrive account.
▷
The vehicle is parked and locked.
▷
The Anti-Theft Recorder can only be used if
vehicle is equipped with an alarm system.
Ensure that the faces of occupants are visible
and are not partially or completely covered, for
instance by face
masks.
Additional information:
Data protection, refer to page
Activating/deactivating interior cam-
era
The interior camera can record and send data
when activated, then be deactivated.
1.
Go through the menu as follows: Apps
menu / "All" / "Interior camera" / "Settings".
2.
Select the desired setting.
Interior camera
Recording mode
Recording
mode
Function
"Single
photo"
Shortly after triggering, a
photo will be taken.
"Smile"
When the system detects a
smile, a picture will be taken.
Recording
mode
Function
"Self-timer
(3 sec.)"
After the timer has expired, a
photo will be taken.
"Burst
mode"
Shortly after triggering, a ser-
ies of pictures will be taken.
Take picture
1.
To take a photo, go through the menu
as follows: Apps menu / "All" / "Interior
camera" / "Camera".
2.
Select the desired recording mode.
3.
Trigger a photo.
Depending on the recording mode selected,
photos are taken shortly after being triggered,
when a smile is detected, or when the timer
elapses.
For burst
shots, the series of pictures will be
displayed as a preview.
Recording video
1.
To take a video, go through the menu
as follows: Apps menu / "All" / "Interior
camera" / "Camera".
2.
Select the recording mode for video record-
ing.
3.
Start the video
recording.
You can only record video for a certain time.
Displaying and managing record-
ings
Saved recordings can be played, sent, and de-
leted in the
vehicle.
With some national-market versions, record-
ings are only shown on the control display
Interior equipment
Controls
299
Online Edition
")


