
Breakdown Assistance
Vehicle features and options
This chapter describes model-specific equip-
ment, systems, and functions that are currently
available, or may become available in the fu-
ture, even if they are not
present in the vehicle.
Additional information:
Vehicle equipment, refer to page
.
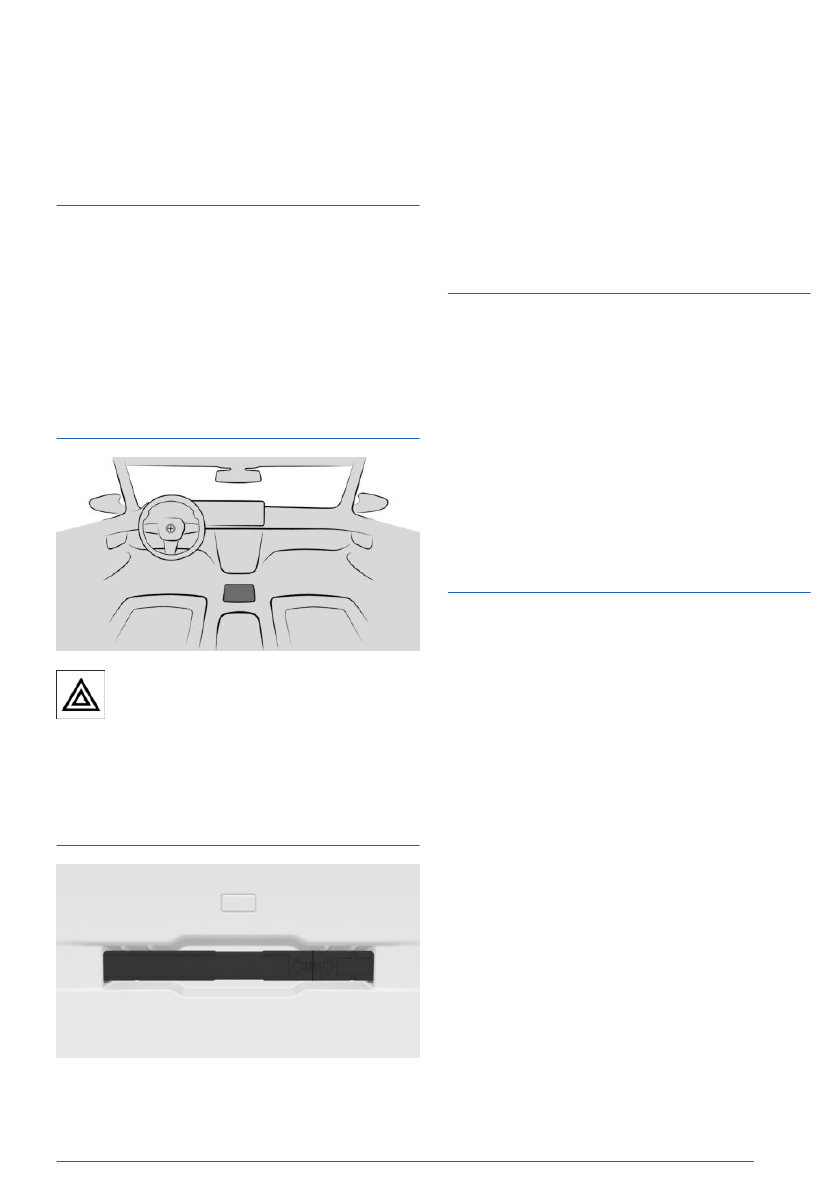
Hazard warning system
The button for the hazard warning sys-
tem is located on the center console.
The red light in the button flashes when the
hazard warning system is turned on.
Warning triangle
The warning triangle is located on the inside of
the tailgate.
To remove the warning triangle, push the
warning triangle to one side and remove it.
First-aid kit
Depending on the vehicle equipment and na-
tional-market version, the vehicle is equipped
with a first-aid
kit.
Storage for the first-aid kit is provided in the
cargo area.
Some of the
articles have a limited service
life. Check the expiration dates for the con-
tents regularly, replacing any expired items
promptly.
Emergency Call
Principle
In case of an emergency, an emergency call
can be triggered automatically by the system
or manually.
Intelligent emergency call
The vehicle features an Intelligent Emergency
Call system, depending on
vehicle equipment.
The Intelligent Assist system establishes a
connection with the BMW
Response Center.
Intelligent emergency calls are made using a
SIM card that is integrated
into the vehicle.
The BMW Response Center then makes con-
tact with the occupants of the vehicle and ini-
tiates further steps to
help.
If an intelligent emergency call is made, the
data used to determine necessary rescue
measures, e.g., the vehicle's current location
if it can be determined, is sent to the BMW
Response Center.
Breakdown Assistance
Mobility
387
Online Edition

Jump-starting
Principle
If the vehicle battery is discharged, the com-
bustion engine can be started using the bat-
tery on another vehicle and two jumper cables.
Only use jumper cables with fully insulated
clamp handles.
Safety information
WARNING
Contact with live components can lead to an
electric shock. There is a risk of injury, danger
to life, and risk of property damage. Do not
touch any components that are under volt-
age.
WARNING
If the jumper cables are connected in the
incorrect order, spark formation may occur.
There is a risk of injury. Pay attention to the
correct order during connection.
WARNING
In the case of body contact between the two
vehicles, a short circuit can occur while jump-
starting. There is a risk of injury and risk of
property damage. Make sure that no body
contact occurs.
Preparation
1.
Check whether the vehicle battery of the
other vehicle has a voltage of 12 volts. The
voltage information can be found on the ve-
hicle battery.
2.
Switch off the engine on the donor vehicle.
3.
Switch off any power consumers in both
vehicles.
Jump-start terminals
The jump-start terminals are located in the en-
gine compartment.
Open
the covers of the jump-start terminals.
Additional information:
For an
overview, refer to page
.
Connecting jumper cables
Before starting, turn off all unnecessary elec-
tronic systems/components, e.g., radio, on the
donor and receiver vehicles.
1.
Open the lid of the jump-start terminal.
2.
Attach one terminal clamp of the positive
jumper cable to the positive battery termi-
nal, or to the corresponding jump-start ter-
minal of the vehicle providing assistance.
3.
Attach the second terminal clamp to the
positive battery terminal, or to the corre-
sponding jump-start terminal, of the vehicle
being started.
4.
Attach one terminal clamp of the negative
jumper cable to the negative battery termi-
nal, or to the corresponding engine or body
ground of assisting vehicle.
5.
Attach the second terminal clamp to the
negative battery terminal, or to the corre-
sponding engine/body ground, of the vehi-
cle being started.
Starting the engine
Never use spray fluids to start the engine.
1.
Start the engine on the donor vehicle and
let it run for several minutes at an increased
idle speed.
If the
vehicle to be started has a diesel en-
gine: let the engine on the donor vehicle run
for approx. 10 minutes.
2.
Start the engine on the vehicle to be started
as usual.
If the first
attempt to start the engine is not
successful, wait a few minutes before mak-
Breakdown Assistance
Mobility
389
Online Edition
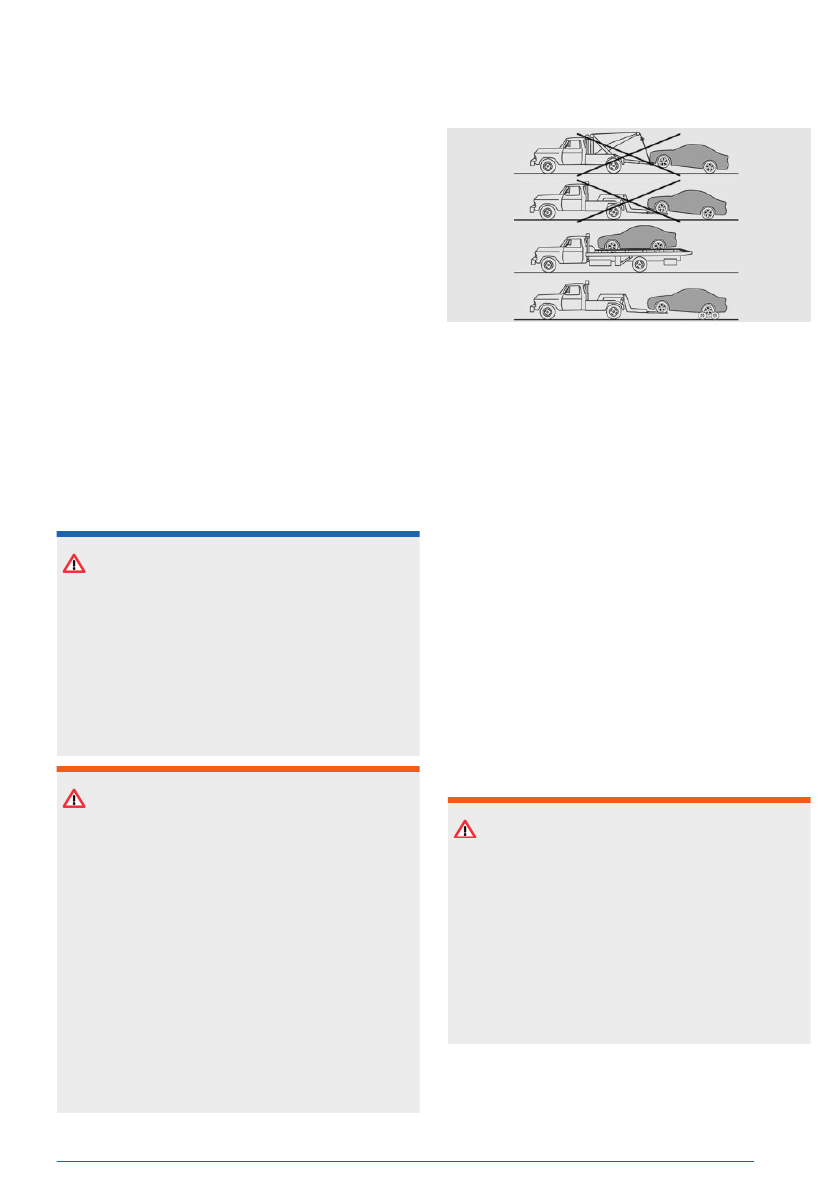
When using a tow dolly, make sure that
none of the wheels touch the ground. This
method should be used for distances of max.
124 miles/200 km. Follow the instructions, as
well as specified loads and speeds, given by
the tow dolly manufacturer.
With xDrive: Transporting the vehi-
cle
Principle
The vehicle must be transported on a loading
platform or tow
dolly.
The vehicle must be transported by an author-
ized service center or another qualified service
center or repair shop.
Safety information
NOTICE
The vehicle can be damaged when towing
the vehicle with a single lifted axle. There
is a risk of property damage. Have vehicle
transported on a loading platform or use a
tow dolly. Tow dollies must be used under
the rear wheels only. Also make sure that no
wheel is touching the ground.
WARNING
The vehicle can become damaged when lift-
ing and securing it. There is a risk of injury
and risk of property damage.
▷ Only lift the vehicle using a suitable de-
vice.
▷ Do not lift or secure the vehicle on the
towing eye, rims, body components, or
chassis components.
▷ For transport, secure the vehicle by plac-
ing special tire straps over the tire tread
surfaces in the vehicle's longitudinal di-
rection.
Tow truck
Have vehicle transported on a loading platform
or use a tow
dolly.
When using a tow dolly, make sure that
none of the wheels touch the ground. This
method should be used for distances of
200 km/124 miles. Follow the instructions, as
well as specified loads and speeds, given by
the tow dolly manufacturer.
Towing other vehicles
Principle
Switch on the hazard warning system, de-
pending on local
regulations.
If the electrical system fails, mark the vehicle
being towed clearly by placing a sign or warn-
ing triangle in the rear window.
Safety information
WARNING
If the gross vehicle weight of the towing ve-
hicle is lighter than the vehicle to be towed,
the towing eye may shear off or the vehicle
may become uncontrollable. There is a risk of
accident, injury, and property damage. Make
sure that the gross vehicle weight of the tow-
ing vehicle is heavier than the vehicle to be
towed.
Breakdown Assistance
Mobility
391
Online Edition
▷
Use only the towing eye provided with the
vehicle.
▷
Screw in the towing eye, completely and
firmly, by turning it at least five turns clock-
wise. If necessary, tighten with a suitable
object.
▷
After use, unscrew the towing eye counter-
clockwise.
▷
Use the towing eye for towing on paved
roads only.
▷
Avoid lateral loading of the towing eye, for
instance do not lift the vehicle by the towing
eye.
▷
Check the attachment of the towing eye in
regular intervals.
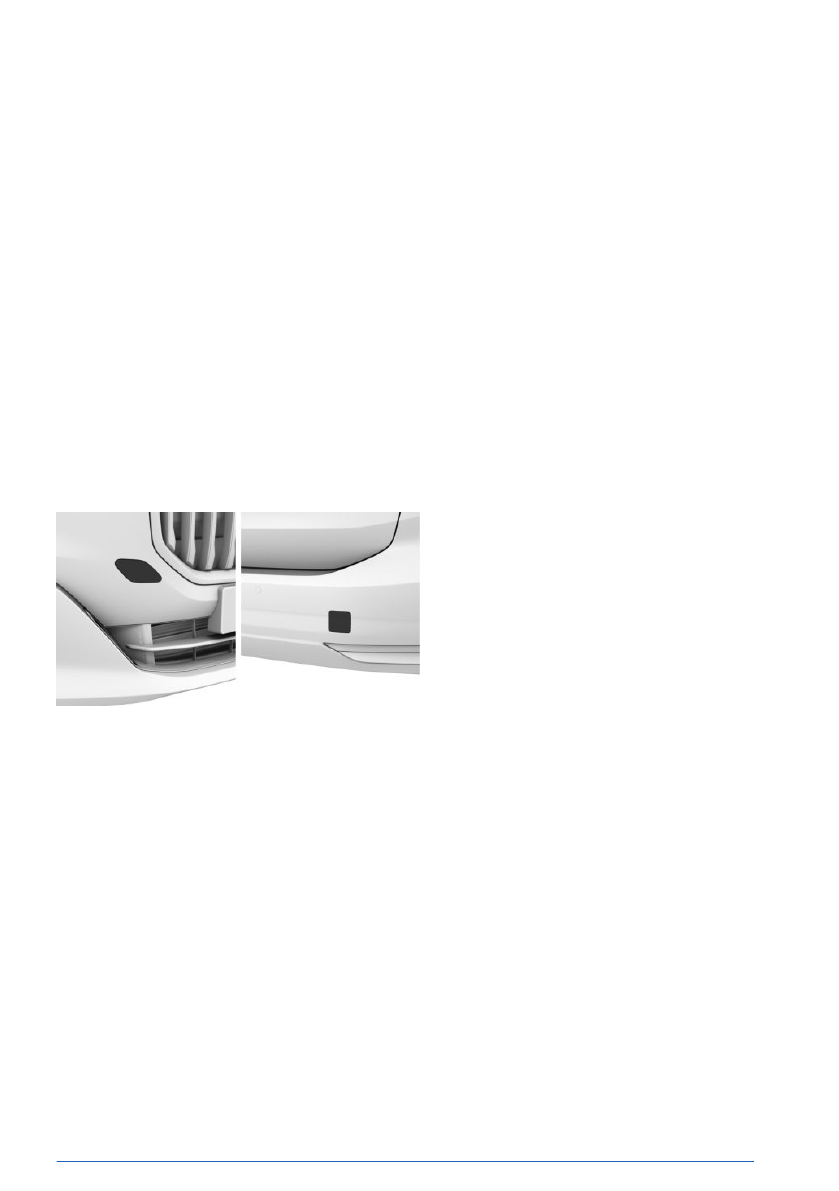
Towing eye thread
The towing eye thread is located behind a
cover on the front and rear
bumper.
To remove the cover, press the mark on the
edge of the cover. To make removal easier,
simultaneously pull on the opposite side of the
cover.
Tow-starting
Do not tow-start the
vehicle.
Start the engine by jump-starting, if possible.
Have the cause of starting issues
corrected by
an authorized service center or another quali-
fied service center or
repair shop.
Additional information:
Jump-starting, refer to page
.
Breakdown Assistance
Mobility
393
Online Edition
")


